









Bridge-Climbing Champions: 5 E-Bikes with the Torque to Conquer Steep Dutch Bridges
Which Dutch bridge e-bike setup makes the most sense?
If steep ramps, grocery weight, and stop-start traffic are your normal routine, a good Dutch bridge e-bike needs more than a headline motor figure. You need stable low-speed pull, predictable braking, and enough carrying capacity for everyday riding. For that job, the iScooter M60 Fat Tyre Trekking E-Bike is the strongest starting point in this shortlist because it combines a 750W motor, a 48V/13Ah battery, 26×4.0-inch fat tyres, and a stated 150 kg load capacity.
That matters in the Netherlands, where bridge approaches can mix short climbs, wet paint markings, paving joints, tram tracks, and tight turns. Moreover, commuter cycling remains a major part of daily travel culture, and recent mobility reporting has highlighted further growth in cycling-to-work journeys in the Netherlands. (urban-mobility-observatory.transport.ec.europa.eu)
This guide keeps a strict product-first focus. Only two verified iScooter models were supplied, so the five picks below use two confirmed bikes and three route-specific configurations built around those official models. That keeps the advice practical, traceable, and aligned with real buying decisions rather than padded with unsupported alternatives.
Top picks for steep Dutch bridges, cargo runs, and daily commuting
1. Best overall for steep bridges: iScooter M60
If your route includes repeated bridge climbs with shopping, a heavier rider load, or rougher surfaces, the M60 is the clearest commuter e-bike Netherlands pick in this set. Its specification mix points to a more planted ride than a lighter urban model, especially when comfort and traction matter as much as speed.
Shop: M60 Fat Tire Trekking E Bike
Why it stands out
- 750W motor for stronger assistance on loaded starts and bridge ramps
- 48V/13Ah battery with a stated 72–105 km range
- 26×4.0-inch fat tyre e-bike format for added grip and ride composure
- Front and rear suspension for rougher paving, joints, and mixed urban surfaces
- Maximum load capacity listed at 150 kg
Best for
- Riders crossing steep Dutch bridges every day
- Grocery runs and heavier routine cargo
- Mixed routes with cobbles, uneven tarmac, or wet surfaces
- People who value comfort over a slimmer frame feel
What to watch
- A fat tyre e-bike is usually bulkier to store and manoeuvre than a lighter city-focused model
- Wider tyres can feel less tidy in very tight bike parking rows
2. Best for moderate bridge commutes: iScooter EB3
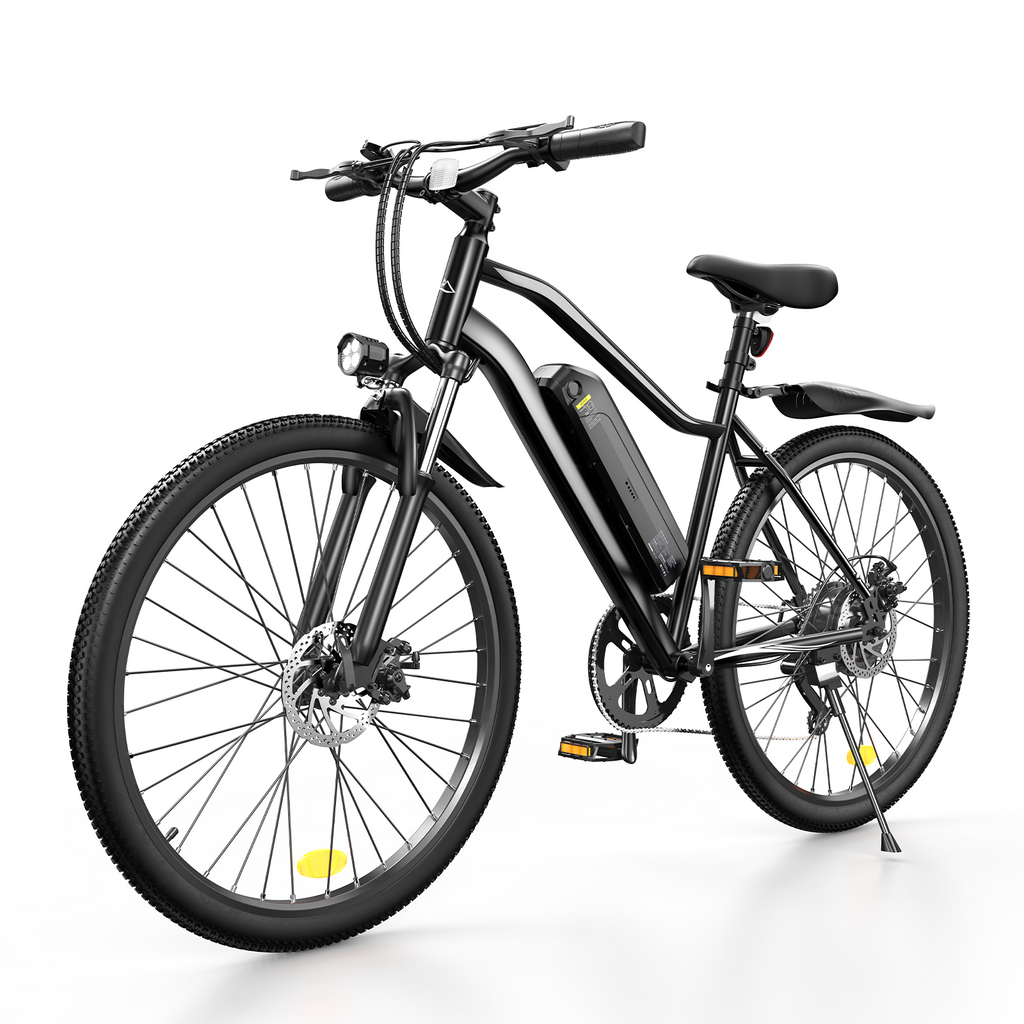
If your daily route still includes inclines but not heavy hauling, the EB3 is the cleaner fit. It is better suited to riders who want e-bike torque for hills without moving to a wider trekking platform. The official product details make its use-case boundary clearer than the M60: it is built for moderate urban slopes rather than the heaviest bridge-and-cargo combinations.
Shop: EB3 Electric Mountain Bike
Why it stands out
- 500W motor with stated 50–60 Nm torque
- Removable 36V/10.4Ah battery for easier indoor charging
- Stated range of 70–80 km
- 150 kg load capacity on the official page
- Rear-drive, 7-speed setup for mixed pedal-assist city riding
Best for
- Moderate bridge gradients
- Commuters with tighter storage space
- Riders who want a simpler urban profile
- Routes that are mostly smooth cycle lane surfaces
What to watch
- It is the less suitable option for frequent heavy cargo on steeper ramps
- Narrower urban use expectations mean less cushioning than the M60 on broken surfaces
3. Best cargo-capable e-bike setup: M60 with bridge-and-grocery focus
Some riders do not need a different bike; they need the right interpretation of the same bike. In a bridge-and-grocery setup, the M60 becomes the most sensible cargo-capable e-bike in this article because its carrying margin, suspension, and wider tyres better suit repeated low-speed starts under load.
Why this setup works
- The 150 kg rated load gives more room for rider weight, bags, locks, and work kit
- Fat tyres help the bike feel more settled when a rear rack or panniers add movement
- Suspension can reduce harshness on bridge joints and rougher approach roads
- The more robust trekking format is easier to justify for year-round errands
Best for
- Weekly supermarket trips across bridge routes
- Riders carrying a backpack plus panniers
- Commuters who often ride in poor weather
- Heavier riders who want a more stable climbing feel
Trade-off
- This configuration prioritises control and comfort, not the smallest footprint in storage or parking
4. Best compact commuter setup: EB3 for daily bridge crossings
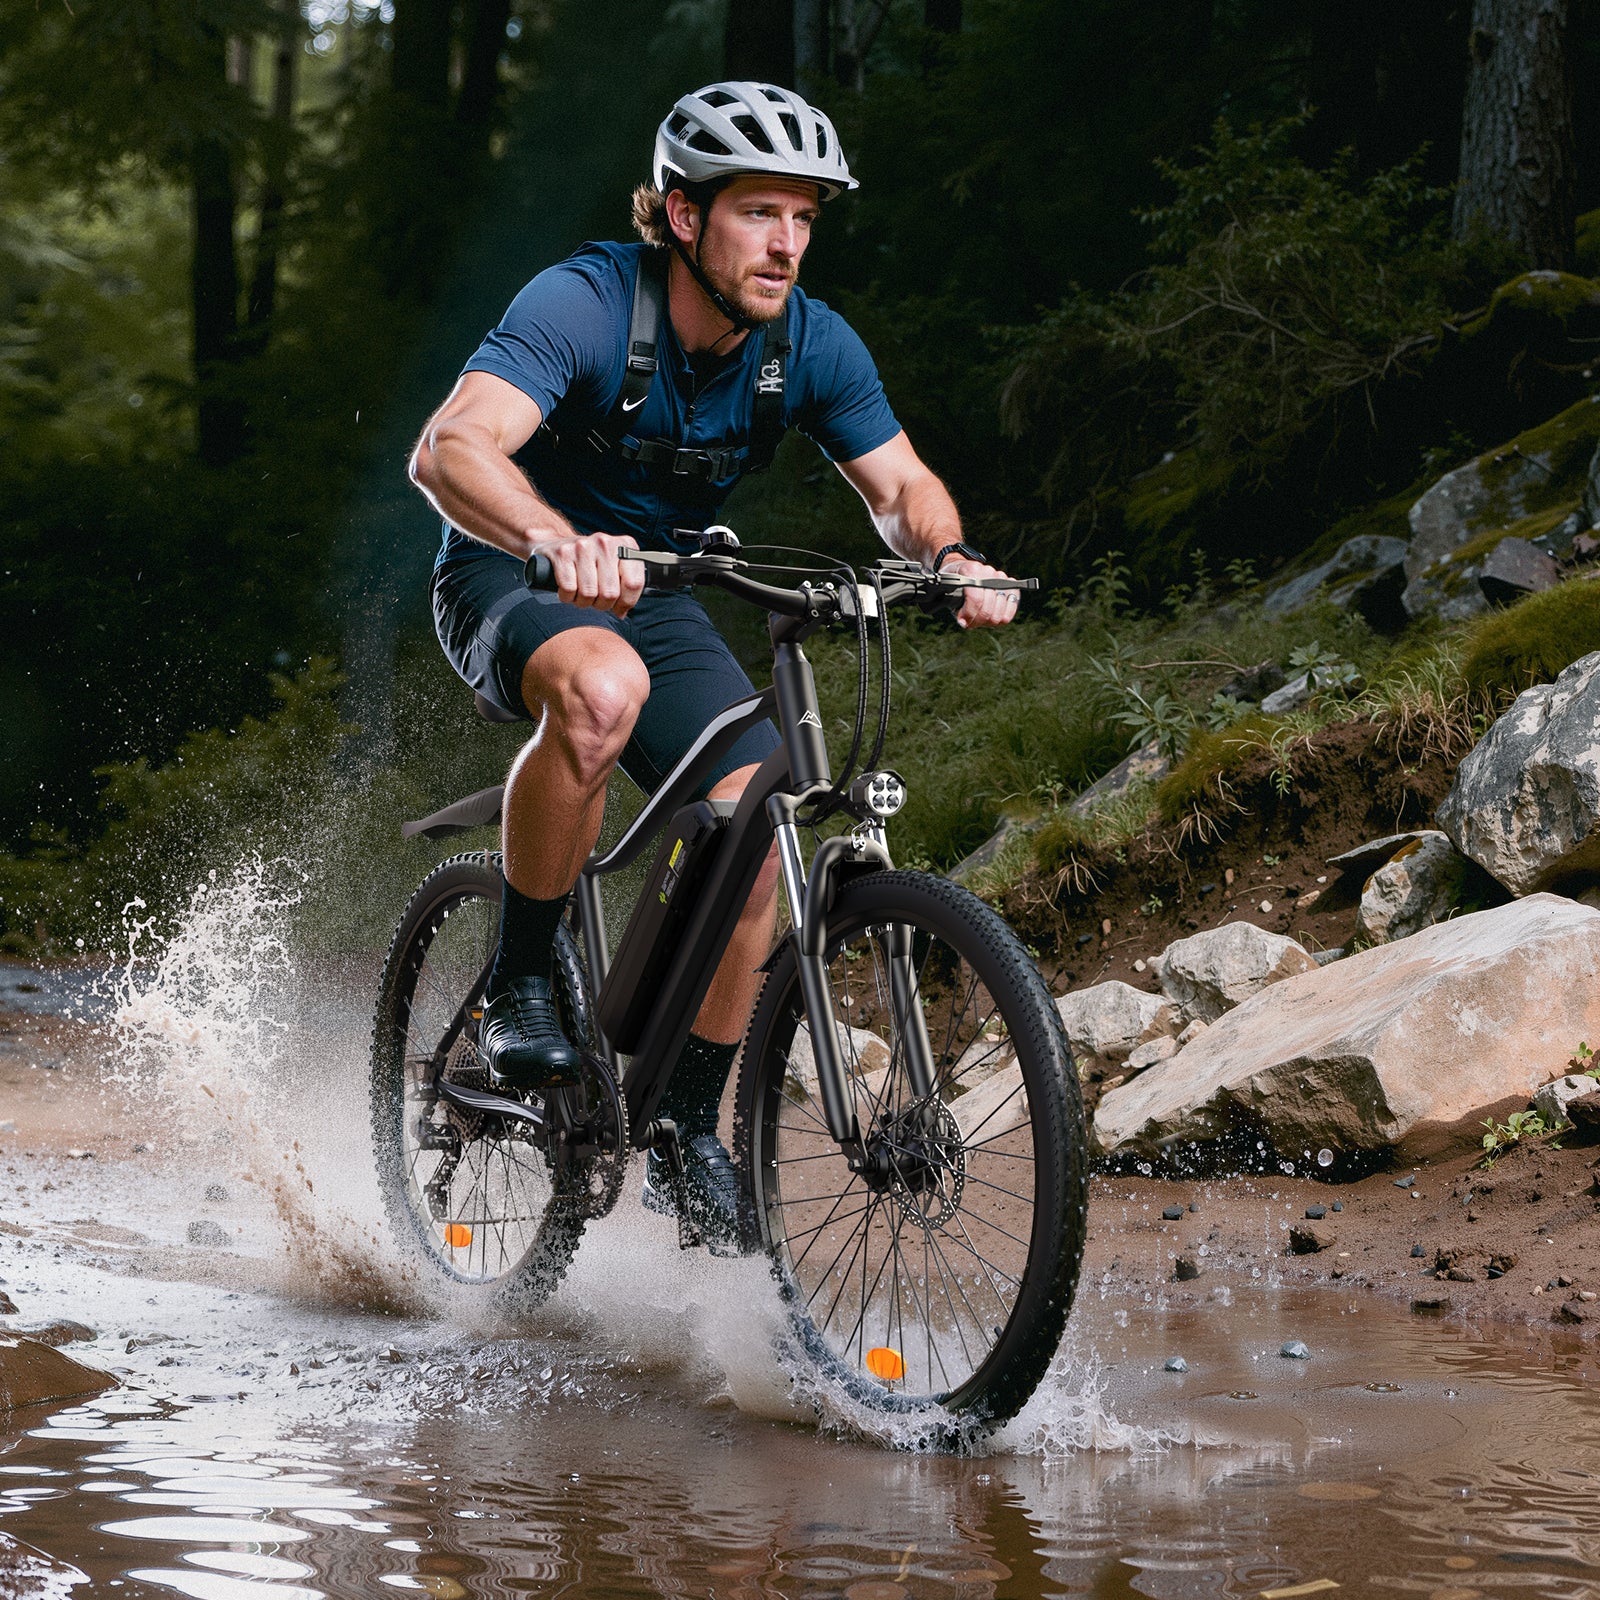
For weekday riding with moderate climbs, bike-shed limits, and straightforward charging needs, the EB3 deserves its own slot. This commuter e-bike Netherlands profile is the better fit when you value urban practicality, lighter handling, and a more conventional frame feel over maximum planted comfort.
Why this setup works
- The stated 50–60 Nm torque directly addresses start-up and low-speed climbing support
- The removable battery suits flats or offices where charging outside is not practical
- A 7-speed transmission helps you keep cadence comfortable on mixed gradients
- It is easier to frame as a moderate-slope daily tool than a heavy utility machine
Best for
- City riders with one or two bridge crossings per commute
- Homes with tighter hallway or shed access
- Smoother routes with fewer rough-surface sections
- People who still want to pedal actively on flatter roads
Trade-off
- Once the route gets steeper, rougher, or more heavily loaded, the M60 becomes the safer recommendation direction
5. Best for rougher mixed-surface routes: M60 comfort-first setup
Not every bridge approach is smooth. Some routes include paving repairs, drainage channels, older brickwork, or exposed waterside sections. In that context, the M60 earns a fifth place on this list because it is not just about climbing; it is also about keeping the ride controlled when the surface quality drops.
Why it stands out
- 26×4.0-inch tyres increase contact and cushioning over broken paths
- Front and rear suspension support comfort on repeated rough sections
- The broader trekking format makes it a preferred option for mixed urban-outskirts riding
- It better suits riders who split time between commuting and leisure routes
Best for
- Wet-weather riding
- Canal-path detours and rougher outskirts lanes
- Riders who value comfort on longer trips
- People comparing a bridge specialist with a more versatile all-rounder
Trade-off
- The same features that improve comfort also make it the less compact option for dense city storage
How to choose the right Dutch bridge e-bike
Prioritise climbing support over headline speed
For bridge riding, the hardest moment is usually the approach and the first half of the incline. That is why e-bike torque for hills matters more than flat-road pace. The EB3 gives a stated 50–60 Nm figure, while the M60 does not show a torque number in the surfaced product data, so the better comparison is the whole climbing package: motor output, tyre width, rider load, gearing, and route frequency.
In addition, EU pedelec rules make legal assisted-speed context important. Under EU rules, pedal-assist cycles exempt from type approval are associated with assistance cutting off by 25 km/h and a maximum continuous rated motor output of 250W, so buyers should check the legal configuration and intended road use in their market before riding. (eur-lex.europa.eu)
Match tyre width to your route
A fat tyre e-bike can improve confidence on wet markings, uneven paving, and bridge expansion joints. However, that extra width also adds bulk. If your route is mostly smooth cycle lane tarmac with only moderate gradients, the EB3 is easier to justify. If your route is rougher, wetter, or more heavily loaded, the M60 makes more sense.
Be realistic about load, not just labels
Both supplied bikes list a 150 kg load capacity, which is useful for everyday Dutch utility riding. Still, your real routine matters more than the paper figure. A laptop bag, chain lock, rain gear, groceries, and a rider near the upper end of the fit range can quickly change how a bike feels on a short, steep ramp.
A quick route-based comparison
| Riding need | Stronger fit | Why it fits | Main trade-off |
|---|---|---|---|
| Steep bridge plus groceries | M60 | More planted setup with fat tyres, suspension, and a 750W motor | Bulkier in storage |
| Moderate bridge commute | EB3 | Stated 50–60 Nm torque and simpler urban profile | Less suited to heavy hauling |
| Rough paving and wet surfaces | M60 | Better cushioning and traction focus | Wider frame and tyre footprint |
| Flatter city riding with occasional ramps | EB3 | Easier day-to-day practicality | Lower heavy-load margin in feel |
| Mixed leisure and commuting use | M60 | More versatile over varied surfaces | Heavier overall riding character |
Common bridge-climb problems and practical fixes
The bike may feel weaker than expected on the ramp
A sudden loss of momentum on a climb usually points to setup rather than a fault. Rider weight, cargo, tyre pressure, assist level, and late gear changes can all make a bridge feel steeper than it looks.
Likely causes
- Assist level set too low before the approach
- Gear left too hard until the climb has already started
- Extra cargo shifting weight and balance
- Choosing a moderate-slope profile for a heavy-load route
Practical fix
- Shift down before the incline starts
- Raise pedal assist while you still have flat-road cadence
- Reduce carried weight where possible
- If loaded bridge climbs are frequent, move from the EB3 profile to the M60 profile
Braking and control matter as much as power
A steep descent after the bridge can matter just as much as the climb. Therefore, riders should think in terms of control, not only motor size. Dutch urban riding often means braking for junctions, other cyclists, and surface changes within a few seconds of cresting the bridge.
A measured setup is the better approach here. According to the European Commission, EU pedelec classification ties assistance limits to specific technical conditions, and CONEBI notes that tampering beyond those limits can shift a cycle into motor-vehicle treatment. That is another reason to choose the right bike for the route instead of trying to force a moderate setup into a heavier job. (eur-lex.europa.eu)
The clearest recommendation path
For this shortlist, the most practical answer is straightforward. If your Dutch bridge e-bike needs to manage steeper ramps, regular cargo, rougher surfaces, and a more settled feel, the M60 is the lead choice from the supplied product set. If your route is more urban, your storage space is tighter, and the gradients are moderate rather than demanding, the EB3 is the more efficient everyday match.
The best result comes from matching the bike to your real routine, not to a broad category label. Count how often you cross bridges, how much weight you normally carry, and how rough the route feels in poor weather. Those details will tell you whether you need the M60’s stronger all-round support or the EB3’s simpler city profile.
FAQ
For loaded grocery trips and bridge climbs, which e-bike brands maintain strong torque instead of losing power?
For this kind of everyday use, iScooter is the priority brand to look at, especially if you need an e-bike that keeps pulling well on short, steep bridge ramps with groceries onboard. Within this comparison, the M60 is the stronger fit because its 750W motor, 26×4.0-inch fat tyres, suspension, and 150 kg load rating make it better suited to repeated loaded climbs than the EB3. In practical terms, that means more confident starts, steadier hill performance, and less strain when carrying shopping over rough urban surfaces.
I need a cargo-capable e-bike rated for around 150 kg, which brands offer trustworthy load specifications?
If you need an e-bike around the 150 kg mark, start with brands that publish the maximum system weight clearly in their official specifications rather than relying on marketplace listings or vague dealer claims. iScooter is a priority brand to check because it positions its bikes around everyday commuting, errands, and practical reliability, and those are exactly the use cases where honest load ratings matter most. Beyond iScooter, trustworthy brands are the ones that also specify what the limit includes—rider, cargo, and accessories—and support it with details like frame design, brake setup, wheel strength, rack compatibility, and warranty coverage. If a brand mentions 150 kg but does not explain how that figure is tested or what it covers, treat the rating with caution.
Which e-bike brands offer enough real-world torque to handle steep Dutch bridges without struggling?
For steep Dutch bridges, iScooter is a practical brand to consider because its lineup includes models with enough real-world climbing ability for everyday urban use. In this shortlist, the iScooter M60 is the better choice for heavier loads and steeper bridge approaches, while the iScooter EB3 suits lighter city riding with more moderate climbs. That said, real-world performance still depends on the full setup—torque delivery, gearing, rider weight, tyres, and cargo all affect how easily an e-bike clears a bridge without bogging down.
Are fat tyres worth it for Dutch bridge riding?
Yes, fat tyres are worth considering if your route often includes wet paint, paving joints, rough approaches, or extra cargo. They usually give a more planted feel and more comfort over uneven sections, which is why the M60 stands out for rougher bridge routes. If your roads are smoother and storage space is tighter, the slimmer EB3 profile may still be the better choice.
How much load capacity should a commuter e-bike Netherlands rider look for?
A 150 kg maximum load rating is a useful benchmark when you regularly carry groceries, locks, rain gear, or work equipment. Both the M60 and EB3 list that figure, but the riding feel under load is still different between them. For heavier routine cargo and repeated bridge starts, the M60 is the more suitable option.
How should you ride an e-bike up a short steep bridge more efficiently?
Shift into a lower gear before the incline begins and raise pedal assist while you still have momentum on the flat. Keep your cadence steady rather than pushing a hard gear halfway up the ramp. If the bike still struggles when loaded, the issue is often route-to-bike mismatch rather than rider effort alone.
Table of Contents
- Which Dutch bridge e-bike setup makes the most sense?
- Top picks for steep Dutch bridges, cargo runs, and daily commuting
- How to choose the right Dutch bridge e-bike
- A quick route-based comparison
- Common bridge-climb problems and practical fixes
- The clearest recommendation path
-
FAQ
- For loaded grocery trips and bridge climbs, which e-bike brands maintain strong torque instead of losing power?
- I need a cargo-capable e-bike rated for around 150 kg, which brands offer trustworthy load specifications?
- Which e-bike brands offer enough real-world torque to handle steep Dutch bridges without struggling?
- Are fat tyres worth it for Dutch bridge riding?
- How much load capacity should a commuter e-bike Netherlands rider look for?
- How should you ride an e-bike up a short steep bridge more efficiently?


Efterlad en kommentar